Aligning Slices Automatically
A number of matching processes, including Feature Based, Mutual Information, SSD (sum of squared differences), and Template Matching, are available for aligning slices automatically (see Registration and Compensation Methods). You should note that methods to quantify the degree of similarity between images, and apply the required linear transformations to register 2D slices within the 3D image stack, are based on different concepts and that results may differ significantly. The performance of each algorithm is also dependent on the input data and the settings selected for registration. You may find that selecting an appropriate matching process for you data is often best done by trial and error.
A number of pre-processing steps may be required to optimize automatic slice alignments. However, you should note that it is often not possible to know in advance which of these pre-processing steps will produce the best results. In addition, you should note that some matching methods can provide a good initial alignment, while others are best for refining an alignment (see Registration and Compensation Methods).
- Input images are often pre-processed to normalize contrast and brightness effects, as well as to correct shading issues (see Image Filters and Settings).
- Sometimes an input image has extra information that is not necessary for registration. In such cases, the first step in registration tasks may be to simplify the image by extracting important information and leaving out the rest. For example, you could run an edge detection or thresholding operation on an image to simplify the image, register the simplified image, and then apply the registration to the original image stack (see Image Filters and Settings and Applying Transformations to Other Datasets).
- It is sometimes necessary to remove or interpolate unrepresentative image slices (see Interpolating and Removing Image Slices).
- If images in the stack require large translations and/or rotations to correct alignment, an initial manual transformation that roughly aligns the images may be necessary so that the images in the stack show approximately the same image content (see Aligning Slices Manually).
Although it is not possible to recommend which matching method will provide the best results for your data or what slice alignment workflow should be used, you should consider the following before you attempt to align slices automatically:
- Template Matching is generally the fastest method, but requires good matches between slices and cannot correct rotations (see Template Matching Settings).
- The Feature Based method can provide a good initial alignment and can work well within selected ranges (see Feature Base Settings).
- Initial alignments done with Template Matching or the Feature Based method can be followed with a subsequent matching method, such as Enhanced Correlation Coefficient, to refine the results.
Transformations can be implemented by either one of two mechanisms — at the input so that the original image data is transformed, or at the output so that a new dataset is created and the original image remains unmodified.
- Right-click the required dataset in the Data Properties and Settings panel and then choose Dataset Slice Registration in the pop-up menu.
The Slices Registration window appears (see Slice Registration Window). Registration options and controls are available in the panel on the left side, while images of the dataset are arranged in the workspace.
- Scroll through the image slices and familiarize yourself with the corrections that need to be made to the image stack, recommended.
Some datasets may only need translation corrections, while others may need more extensive transformations. You should also note if it would be best to process selected ranges rather than the whole stack.
- Choose a registration method — Enhanced Correlation Coefficient, Feature Based, Mutual Info, Optical Flow, SSD or Template Matching — in the Registration method drop-down list (see Registration and Compensation Methods for information about the available matching processes).
- Choose the settings for the selected registration method (see Registration Method Settings).
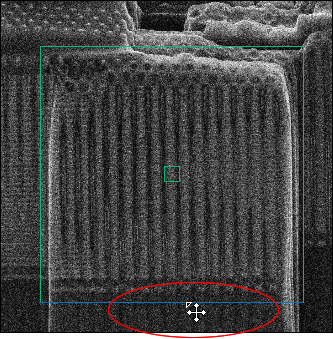
- Check the Use selection box option, if required, and a selection box type — Fixed or Follow template (see Registration Options).
When selected, calculations for the required transformations will be constrained to the 2D region defined by the selection box (X and Y axes only).
- Do the following if you selected Fixed as the Use selection box option:
- Adjust the selection box so that it only includes features
you want to be considered for alignment. If required, you can select the slice range that includes the identified features.
To adjust the selection box, simply drag the edges of the selection box. You can also translate the box by dragging from the center.
- Scroll through the image stack and verify that the selection box is large enough to follow the feature(s) on all image slices or within the selected range.
- Adjust the selection box so that it only includes features
you want to be considered for alignment. If required, you can select the slice range that includes the identified features.
- Do the following if you selected Follow template as the Use selection box option:
- Adjust the selection box so that it only includes a representative sample of features common through the image stack. If required, you can select the slice range that includes the identified features. In this case, you should set the template on the first slice in the selected range.
To adjust the selection box, simply drag the edges of the selection box. You can also translate the box by dragging from the center.
- Select a matching method in the drop-down menu (see Registration Options).

- Click the Preview Template Matching button to view and evaluate the matching result.

If required, you can select another matching method and then preview and evaluate the results.
- Adjust the selection box so that it only includes a representative sample of features common through the image stack. If required, you can select the slice range that includes the identified features. In this case, you should set the template on the first slice in the selected range.
- Check the Use slice range option, if required. If selected, the calculations performed for transforming the dataset will be limited to the selected slice range (see Registration Options).
Do one of the following to select a slice range:
- Enter the minimum and maximum slice numbers in the Min and Max edit boxes.
- Scroll to the required image slice and then click the Set button to set the Min or Max slice number.
- Click the Apply button to automatically align the slices in the dataset.
- Evaluate the results by scrolling through the registered dataset and by examining the lateral views.
- When you scroll through the dataset in the main view, pay attention to the features that should be aligned within the dataset. There should no observable positional or rotational jumps as you scroll through the dataset.
- When you examine the lateral views, features should be aligned vertically, even though the image stack is not.

-
If required, you can continue the current registration by modifying the selected parameters or by changing the registration method.
You can also click the Undo button to undo the current registration or you can roll-back to any other point in the process by changing the current registration applied.

- Do the following to apply linear displacement compensation, if required.
- Choose Linear Displacement Compensation in the Registration method drop-down menu (see Registration and Compensation Methods or information about this compensation method),
- Adjust the compensation factor with the Compensation Factor slider in the Settings box, if required.
- Click the Apply button to apply the selected compensation.
- Save the transformation template, optional (see Saving and Loading Transformation Templates).
- Select the Create new dataset option, if required.
If selected, a new dataset will be created as the output of the transformation process. If not, the transformation will be applied directly to the original image data.
- Select an additional dataset to apply the transformation to, optional (see Applying Transformations to Other Datasets).
- Click the OK button to complete the transformation process.
See Exporting Images for information about saving modified or new datasets.